Fringe removal – it works!
Fringing is caused by wave interference in the very thin CCD detector material, not unlike the colorful rings you see in a oily puddle. In astronomical images, it commonly shows up as darker or lighter regions and/or bands, caused by night sky emission lines interfering constructively (producing a bright region) or destructively (making the frame a little darker). Fringing typically is only a problem for observations at long wavelengths where the wavelength of the light is comparable to the thickness (variation) of the CCD. The structure of the fringing is then determined by thickness variations in the detector material, and as such should be stable over long timescales.
For ODI, fringing is mostly a problem in the i’ and z’ band filters and some narrow-band filters in the same wavelength range. The structure of the fringing itself is easily derived from a series of dithered science frames taken under dark sky condititions. However, the amplitude varies with time, due to variations in the strength of the night sky emission lines and amount of scattered moon light that does not contribute to the fringing. Proper fringe removal and/or correction hence requires us to match the amplitude of the fringe template to the fringing amplitude in the science frame.
After some fiddling around and trying multiple different methods I finally got a working solution that works fast and reliable. The method I ended up implementing is described in Snodgrass & Carry 2013, Messenger 152, 14.
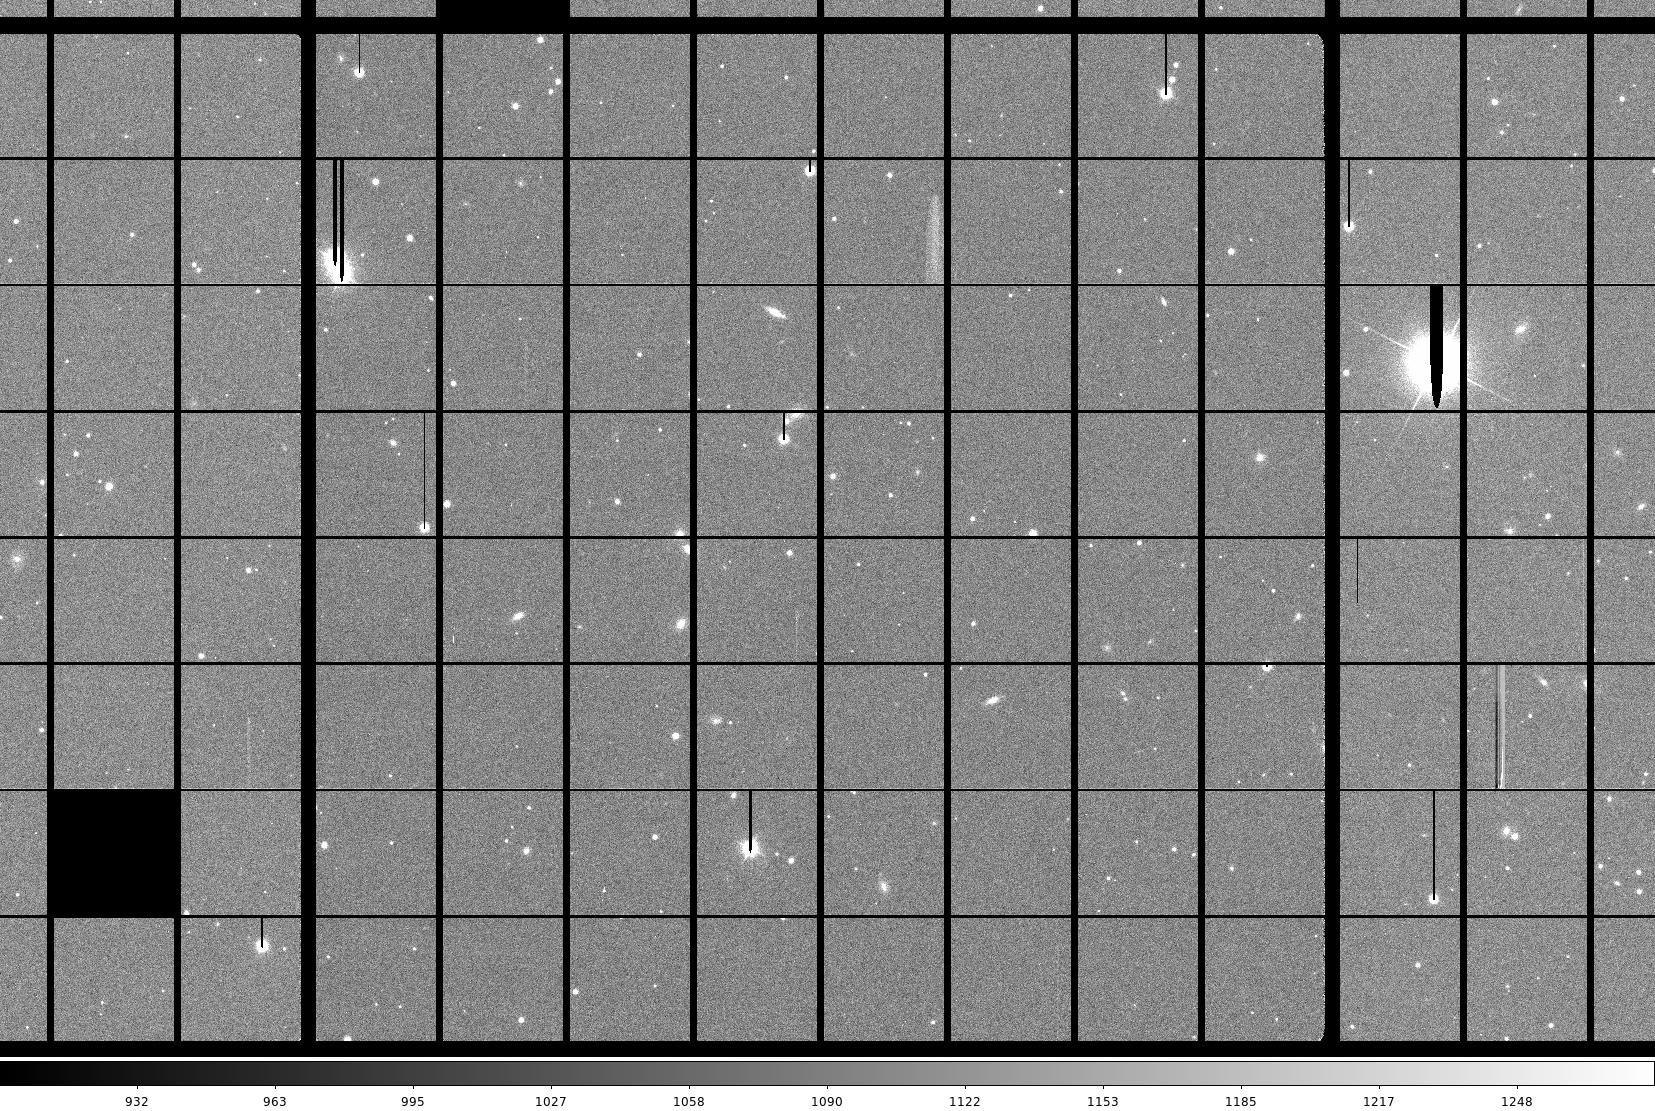
A first demonstration is shown below:
This is the “before” – the fringing is clearly visible.
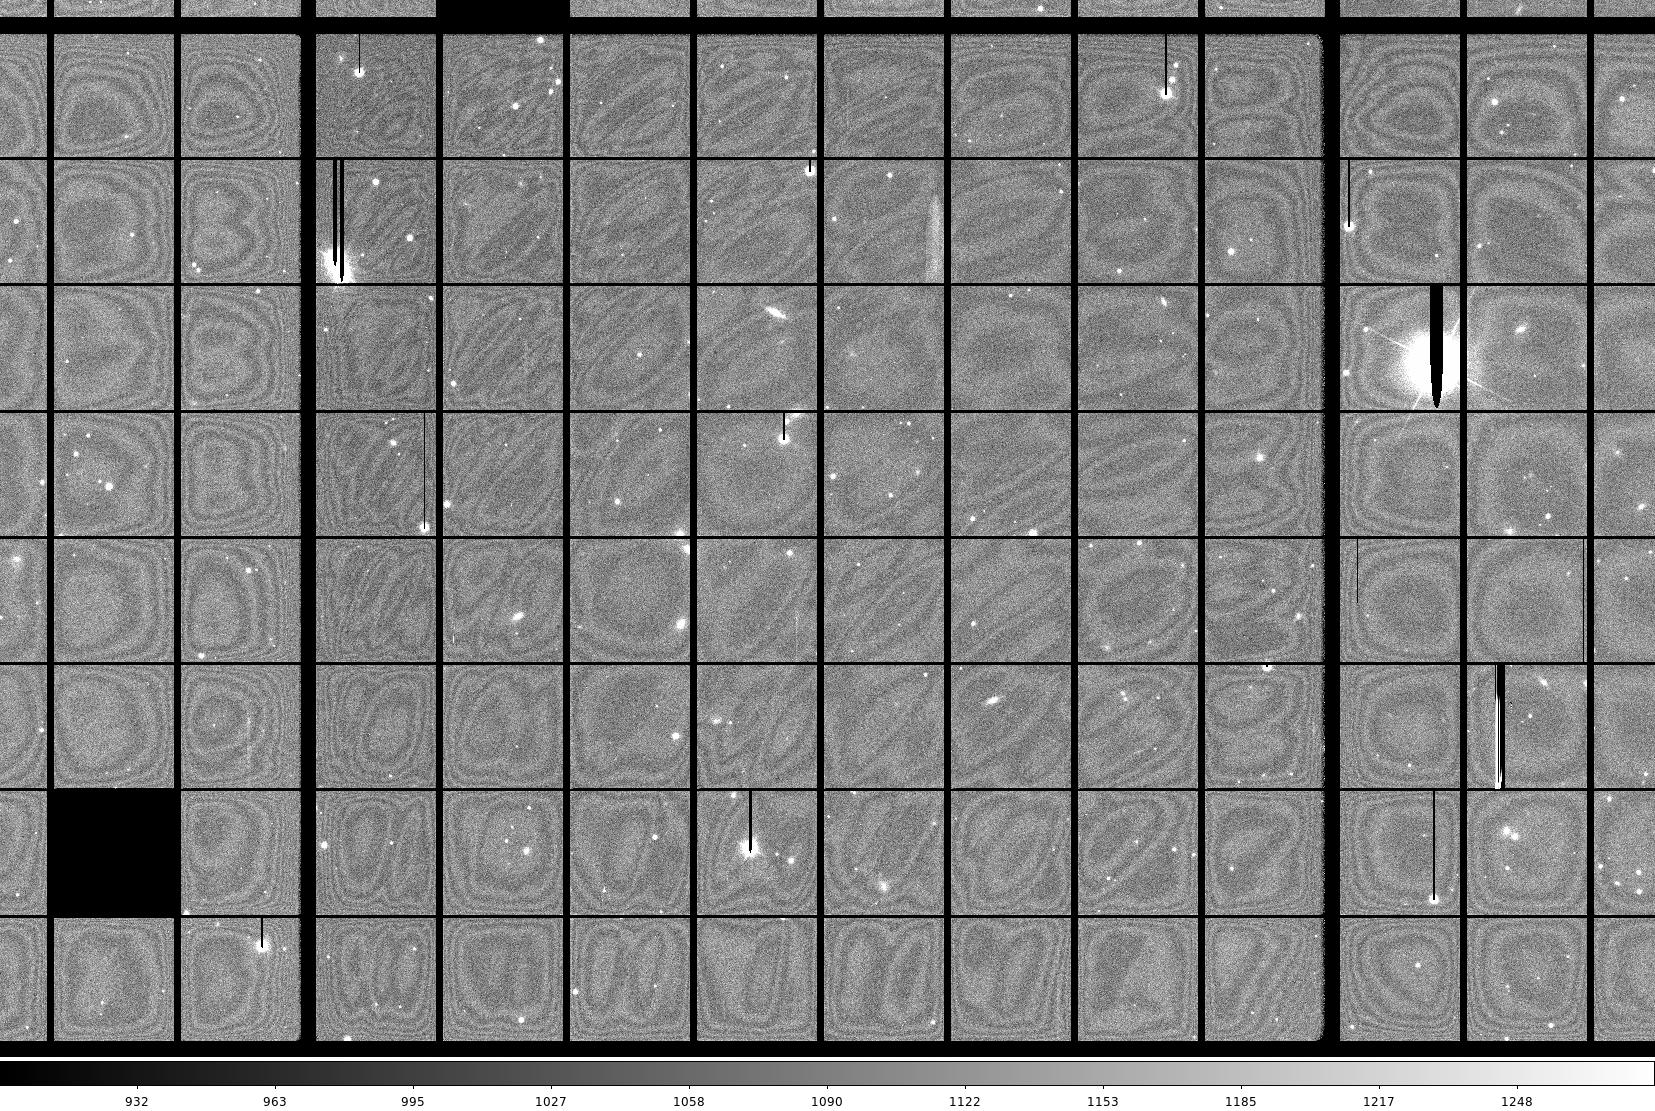
And this is the “After” – all fringes are cleanly removed.